Description
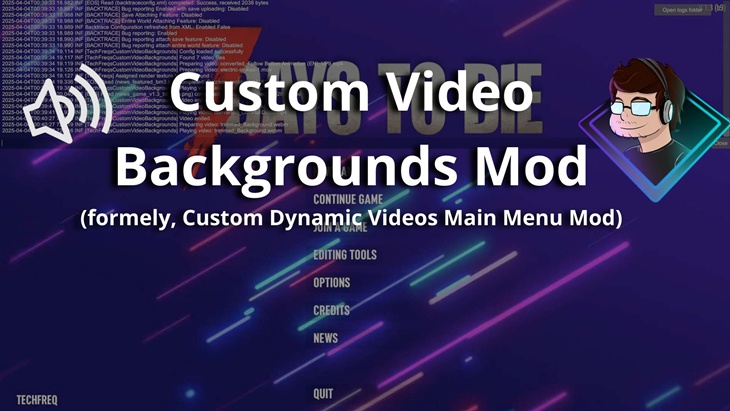
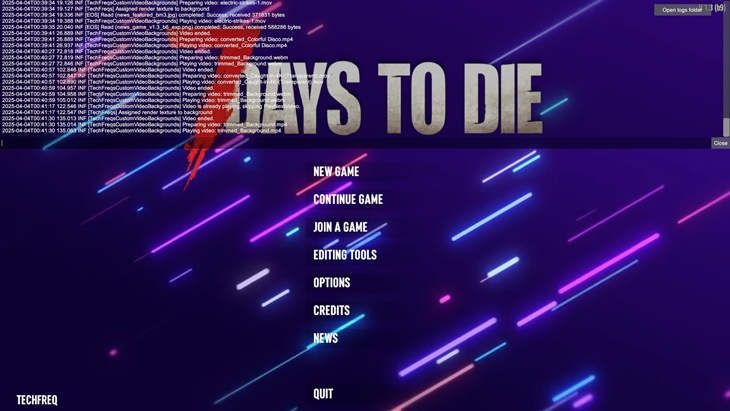
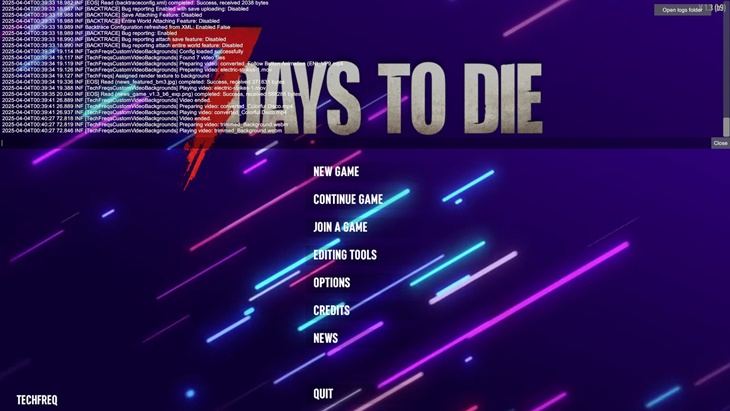
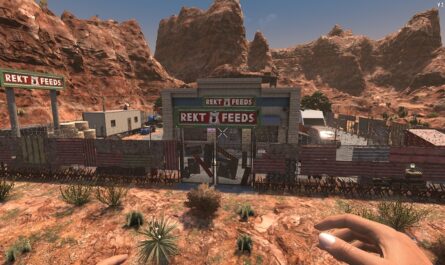
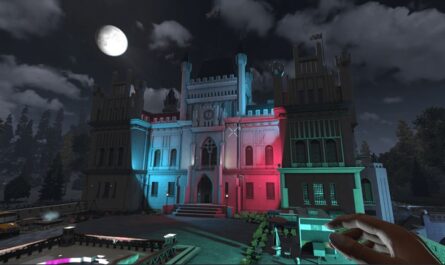
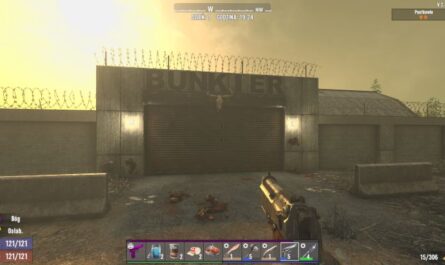
The TechFreqs Custom Video Backgrounds Mod V1.5, for 7 Days to Die enhances the game by allowing players to use custom video backgrounds in the main menu. This mod replaces the default static background with dynamic video files, providing a more immersive and personalized experience.
Supporting various video formats (WebM with VP8, MP4 with H.264, and MOV with H.264) includes a fallback mechanism with conversion tools if video playback fails.
This mod was also developed with extra batch conversion script tools, with flexibility in mind, allowing users to easily convert and trim their own existing video files using a set of custom batch scripts readily available! making it easy for users to customize their 7 Days to Die main menu with dynamic video backgrounds.
These scripts ensure that videos are in the correct format, resolution, and duration for optimal performance in the game and if not feel free to use the trim batch script to trim the video between 30 seconds or 1minute videos and rerun that through the conversion batch scripts, although 1 minute long 1080p or 720p videos should be just fine.
The mod can also load multiple video files, from the Resources folder, By default, it randomly selects a video to play each time the main menu is loaded, adding variety to the experience, and or until the video has finished playing it plays the next random video and or in sequence if you prefer BUT configurable in the config json file.
Videos are preloaded and cached to reduce loading times but ag ain since it’s using a config.json file to control video playback settings it hooks into the game’s main menu UI and replaces the default background with a texture.
Key Features:
Custom Video Backgrounds: Replaces the default main menu background with user-provided video files.
Supported Formats:
WebM (VP8 codec, non-transparent)
MP4 (H.264 codec, non-transparent)
MOV (H.264 codec, non-transparent)
Fallback Mechanism: Displays a static PNG image in Textures folder (mainmenuoverlay.png) if video playback fails.
Video Conversion Tools: Includes batch scripts to convert and trim videos into the required formats, ensuring compatibility with the game.
Video Conversion Tools Debug Logging: The conversion scripts include step-by-step debug logs to help users troubleshoot any issues during video preparation.
Mod debugging logging in F1 logs so that way the user can see what video was loaded and or skipped.
Debug log for troubleshooting! incase i don’t happen to see comments here, in the logs there are links to my social media for further support in highlight blue text.
Now including in V1.3 The ability to input a custom folder for custom videos woo!
Now including in V1.3 The ability to mute the main menu music, after the news screen of course for seemless video playback.
Example Folder & Config Json Structure:
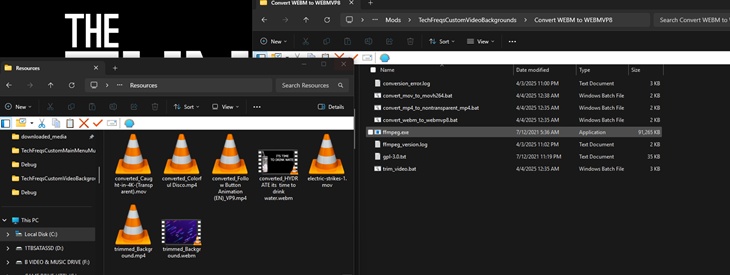
The mod and its associated tools are organized as follows:
Resources folder for videos
Textures folder for transparent png for background
Config folder, XUi_Menu folder for windows xml
and Root folder for mod dll and config json file.
Convert Video Formats Folder for the batch scripts as needed
Move the converted/trimmed videos to the Resources folder as needed after conversion.
New Example Config Json:
{
“EnableDebugLogging”: false,
“MuteVideoAudio”: false,
“RandomVideoSelection”: true,
“VideoVolume”: 0.5,
“AllowedExtensions”: [“.mp4”, “.webm”, “.mov”],
“LoopVideos”: true,
“ResumeFromLastPosition”: false,
“CustomVideosFolder”: “Resources”,
“MuteMainMenuMusic”: true
}
More details on example config json
“EnableDebugLogging”: true, // Logs detailed debug info to the game log (e.g., video playback, music muting). Set to false to disable.
“MuteVideoAudio”: false, // If true, mutes audio from background videos. If false, audio in the custom video plays.
“RandomVideoSelection”: true, // If true, selects a random video from the folder. If false, plays videos in order sequentially.
“VideoVolume”: 0.5, // Volume for video audio (0.0 to 1.0). Ignored if MuteVideoAudio is true.
“AllowedExtensions”: [“.mp4”, “.webm”, “.mov”], // File types allowed for background videos .
“LoopVideos”: true, // If true, loops the current video or plays the next one. If false, stops after one play.
“ResumeFromLastPosition”: false, // If true, resumes video from last position when restarting. If false, starts from beginning.
“CustomVideosFolder”: “Resources”, // Folder for videos. “Resources” uses Mods/TechFreqsCustomVideoBackgrounds/Resources/ by default but Can be a custom path make sure to uise double slashes like D:\\Resources\ and or D:\\Videos\VideosForMenu
“MuteMainMenuMusic”: false // If true, mutes the game’s main menu music. If false, music plays normally
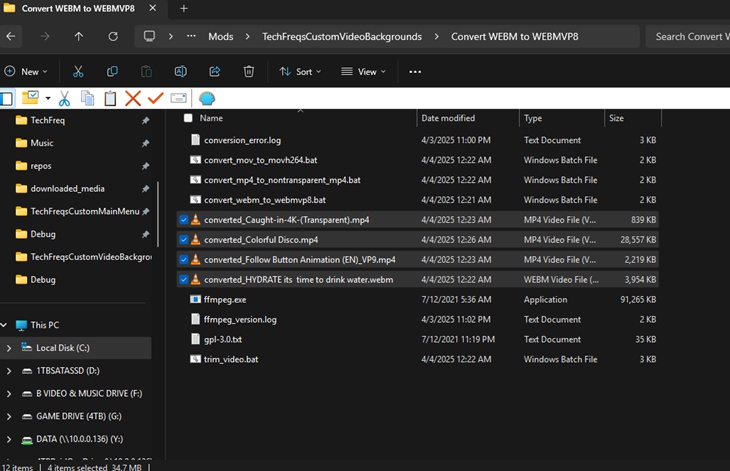
Using the Conversion Scripts:
The mod includes four batch scripts to help you prepare video files for use in the game. These scripts use FFmpeg (included in the Convert WEBM to WEBMVP8 folder) to convert and trim videos into the required formats. Each script includes step-by-step debug logs to help you track the process.
Prerequisites for conversion:
Ensure ffmpeg.exe is present in the Convert WEBM to WEBMVP8 folder. If it’s missing, download it from
https://www.gyan.dev/ffmpeg/builds/
(e.g., ffmpeg-release-essentials.zip) and place ffmpeg.exe in the folder.
Scripts Overview:
convert_webm_to_vp8.bat:
Purpose: Converts WebM files to WebM with VP8 codec.
Input: Any WebM file.
Output: converted_<filename>.webm in the Convert WEBM to WEBMVP8 folder.
Usage: Drag and drop a WebM file (e.g., Avalanche.webm) onto the script.
convert_mov_to_h264.bat:
Purpose: Converts MOV files to non-transparent MOV with H.264 codec.
Input: Any MOV file.
Output: converted_<filename>.mov in the Convert WEBM to WEBMVP8 folder.
Usage: Drag and drop a MOV file onto the script.
convert_mp4_to_nontransparent_mp4.bat:
Purpose: Converts MP4 files to non-transparent MP4 with H.264 codec.
Input: Any MP4 file (including those with transparency).
Output: converted_<filename>.mp4 in the Convert WEBM to WEBMVP8 folder.
Usage: Drag and drop an MP4 file onto the script.
trim_video.bat:
Purpose: Trims videos to a specified duration (30 seconds or 1 minute) and outputs either WebM (VP8) or MP4 (H.264).
Input: Any video file (WebM, MP4, MOV, etc.).
Output: trimmed_<filename>.webm or trimmed_<filename>.mp4 in the Convert WEBM to WEBMVP8 folder.
Usage:
Drag and drop a video file onto the script.
Choose a duration (1 for 30 seconds, 2 for 1 minute).
Choose an output format (1 for WebM, 2 for MP4)
Notes:
The mod supports WebM (VP8), MP4 (H.264), and MOV (H.264) files. Ensure your videos are in one of these formats.
Transparency is removed in MP4 and MOV outputs to ensure compatibility with the game.
Performance:
Videos should be kept at a reasonable resolution (e.g., 1280×720 or 1920×1080) and bitrate (e.g., 2M for VP8, 5M for H.264) to avoid performance issues in the game.
Trimming videos to 30 seconds or 1 minute helps reduce file size and loading times.
If a script fails, check the debug logs in the command prompt output to identify the step where it failed.
ALSO beware of the version 1.4, debug logs when on will spam the logs ,so for now set to false so its not as spammy switching between windows
Disclaimer:
By using this mod, you acknowledge that TechFreq is not responsible for any issues, crashes, or conflicts caused by its use.
Use at your own risk. Please backup your game files before installing any type of mod.
Thanks for downloading and enjoy!
Installation:
Make sure harmony mod exist in the mod directory as it’s required.
Download the mod files, Extract Mod files.
Please backup your world, save, and or game files.
Place them in your Mods directory of your 7 Days to Die Game.
EAC must be disabled, although i hope in the future that can be changed, as for now DLLS are not EAC supported however XML has no issue, unfortunately this is a dll modification.
THIS IS CLIENT SIDE ONLY but maybe perhaps this is also, server side and client side compatibility?
No further setup needed. Enjoy!
CREDITS:
Thanks to TechFreq & A.I, ChatGPT or Microsoft CoPilot A.I or Grok AI from Twitter or X, for helping me create the modlet, aswell as with very little modding knowledge for the game and learning as i go i couldn’t do this without it and overall brainstorming and or the modding community.
I’d very much appreciate it and or any feedback for the mod(s) aswell
Support Notice: The best way to support TechFreq other than downloading mods, sharing the mod with friends, leaving feedback and endorsing the mod in general is all that i ask for, but if you want to go the extra mile although not necessary you may use Donation Links through paypal or ko-fi pages which again helps me a bunch!
However, Donations aren’t expected, every little bit of support helps along the way & fuels more mods, music, and bug fixes in the future,so thanks again for reading and being awesome in general and checking out the mod post.
Social Media:
If you appreciate ‘TechFreqs’ work and want to show support, use this donation link, although not necessary. Kofi Page.
I appreciate it in general for just checking out the mod posts, sharing and enjoying any of the mods in itself. Thank you again! and Happy gaming!
Love this mod? Got feedback or ideas or need to troubleshoot?
Join the TechFreq Pretty Rad Squad Discord Server!
Chill with us on Discord for game chat, memes, and even more mod updates!
As for TechFreqs music, it’s royalty-free music to use in your projects or for casual listening!
Source music files are available feel free to ask away, available in the discord! or for more content! TechFreqs Socials: https://beacons.ai/techfreq
Checkout the behind-the-scenes vibes today! Thank you again for checking out the mod post.
License: CC BY-NC-SA 4.0
This mod is licensed under Creative Commons Attribution-NonCommercial-ShareAlike 4.0 International. You can use it for personal play in *7 Days to Die*. Modifications or sharing require crediting TechFreq, linking to the mod page, and using the same license for derivatives. Contact me at beacons.ai/techfreq for permission for any modifications or changes.
See LICENSE.txt or http://creativecommons.org/licenses/by-nc-sa/4.0/ for full terms.
Note: Monetized videos/blogs showcasing this mod are allowed along as with credit to TechFreq.
Images
Changelogs
V1.5
Updated for 2.0 aswell as consistency labels for readme file
Previous Updates
V1.4
Fixed a bug where when entering other menus it restarts the playback of the video..
Fixed a bug where when entering a world and exiting the world, playback works or doesn’t at all half the time.
Notice: beware of the version 1.4, debug logs when on will spam the logs ,so for now set to false so its not as spammy switching between windows
V1.3
Adds custom folders for config json instead of the default resources folders
adds debug thank you and troubshoot msg support in logs
adds custom mute main menu music in config json
V1.2G
As for 1.2G
-Subtle fix for where the ModInfo xml, if the mod wouldnt work due to a folder naming issues, its gotta match the name value in the ModInfo name value property in the xml file. So reuploaded the mod but just created a folder with the contents inside the correctly named folder, instead of just files in the download zip with just contents without a folder, as the download has an minus symbol and numbers after downloading from servers and after extraction not everyone may know that the label needs to match the ModInfo xml name value.. and for whatever reason i suppose servers don’t add that specfic folder for file naming, per zip with files in them instead of a straight folder label of the mod, thus the error.
(P.S as for testing i had installed previously the skip news mod, so i would believe if uninstalled it should take a second or so and the background should be changed for the dynamic video wallpaper with your existing videos for your choosing! and or if you may see a small black blip round the text, due to the texture png that i’m using i barely know of any use for GIMP on photo editing may anyone provide a flexible version so it wouldnt do that after its loaded and such only happens for a quick millisecond those so tiny bug , but functional!)
Example Folder Structure:
The mod and its associated tools are organized as follows:
Resources folder for videos
Textures folder for transparent png for background
Config folder, XUi_Menu folder for windows xml
and Root folder for mod dll and config json file.
Convert Video Formats Folder for the batch scripts as needed
Move the converted/trimmed videos to the Resources folder as needed after conversion.
Example Config Json:
{
“VideoSettings”: {
“RandomizeVideos”: true,
“SpecificVideo”: “”,
“LoopVideos”: true,
“Volume”: 0.5,
“FadeInDuration”: 1.0,
“FadeOutDuration”: 1.0
},
“FallbackSettings”: {
“UseFallbackImage”: true,
“FallbackImagePath”: “Textures/mainmenuoverlayV1.png”
},
“PerformanceSettings”: {
“MaxResolution”: “1920×1080”,
“MaxBitrate”: 10000
}
}
Download
Download Link:DOWNLOAD ✔ Verified Safe (33 MB)
External Backup Link:DOWNLOAD ✔ File Scanned (33 MB)
I do this for fun in my free time. Donations, Downloads, Feedback are appreciated, and help towards making new mods or content in the community.
If you appreciate my hard work feel free to send me a hazelnut coffee! Alternate donate link if preferred (Paypal).
Credits: TechFreq


If you have any questions or have any problems/bugs, please use the support link (Discord, Forum Topic, GitHub Issues, etc.) in the post. If there is no support link in the post, please use the comments section.